|
|
|
|
|
Viewer Photos
Send photos! Before,
in progress, & completed Crestliner restoration photos welcome.
Add photo captions, your story & your email (if you want it listed).
|
|
Email
or mail photos to: Pamela Matson
6198 McQuade Rd Duluth, MN
55804
[email protected]
|
1956
15' Crestliner
Voyager Convertible
Restored by Mark Browne
|
Click on images to enlarge
Select BACK in browser
to
return to this page |
|
|
Sep 01, 2002 Preparing to paint the deck.
|
Recent updates are listed first |

|

|
|
|
|

|

|
|
|
|
|
|
|
|
|
|
|
|
|
|
|
|
|
|
|
|
|
|
|
|
|
|
|
|
Sep 01, 2002 Preparing to paint the deck.
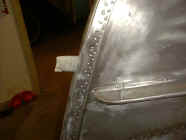
I put painters tape over the outside of the holes in the transom. Even
with
tight newspaper paper, some paint may dribble through any opening.
Then I covered the outside of the transom with newspaper.
The bottom and sides of the engine compartment are rather tricky. There
are
large openings to pass the steering cables, and the sides of the
compartment
do not reach all the way up to the hull. This leave large gaps for
paint to
get inside the hull during painting. I covered this with sheets of
newspaper attached to the underside of the deck and the inside of the
transom, leading all the way to the bottom of the engine compartment. Most
of this was done laying on my back in the cutout between the rear seats.
I masked off the around the deck, splash rails, and engine compartment.
Covering the interior of the boat was somewhat of a pain. Mostly it was
lots
of newspaper, tape and time. I chose to mask the forward handle. I thought
about taking this off to get a better finish. The fasteners were very hard
to get at, and in the end I just decided to paint around it. This turned
out
to be a tricky bit to get where the handle meets the hull.
As with the other parts of the hull I used scotch-bright and thinner to
scrub off the aluminum oxide. The surface brightened and took on more of a
matte appearance.
I made a point to cover the lights and wheels. Stray spray paint will fog
the lights.
Mark Browne
|
|
|
|
|
|
|
|
|
|
|
|
|
|
|
|
|
|
|
|
|
|
August 27, 2002
Painting the hull - part 2
|
|

|
 |
|
|

|
 |
|
|
|

|
 |
|
|

|
 |
|
|

|
 |
|
|

|
 |
|
|
|
|
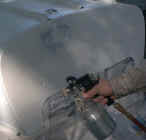
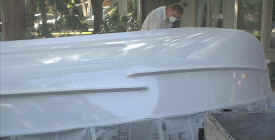
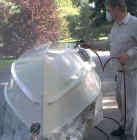
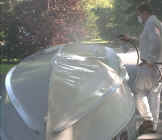
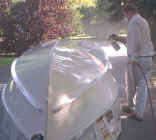
August 27, 2002 Painting the hull - part 2
I started by shooting the transom. I don't expect to get complete
coverage.
If you look at the pictures you can see that the first pass is pretty
thin;
you can still see the primer through the paint. Then I moved to a side and
sprayed both side of each fin. This allowed me to get the best angles to
insure complete coverage of the fin. I recommend this general plan for the
best overall finish. If you try to do the details (fins and handles are
details) while you are doing the flat areas you will end up with very
uneven
coverage.
Here are some details of applying paint with an airgun. You control
pattern
size by adjusting your distance. You adjust the paint thickness by
adjusting
your speed of application. Once you pick a speed try to keep it constant
during the entire pass over a flat area. Try to keep the airgun at right
angles to the surface being painted. You should not stand in one spot and
wave the gun back and forth - start at one end and cover the boat from
end-to-end. You want to keep of a good even pattern while doing the flat
areas because even minor variations will stand out in the finished
product.
Most guns have a two speed trigger. The first just blows air, the second
adds paint. Use the air position to establish a smooth even flow before
you
release the paint. You will avoid blotches and spatters at the start of
the
pass. The same applies at the end of each pass.
For a good gloss coat the paint must have a smooth wet finish as you apply
it. The paint must be thick enough for the surface tension of smooth the
paint out. If you are putting the paint on too thin (fast) you will
get an
uneven pebble-like finish. No amount of additional paint will fix this. If
you allow this to happen you will be spending time with 320 grit sandpaper
to smooth the coat. The opposite extreme is going too slow. The
paint will
build up past what the surface tension can hold; you get a run. Getting
the
right speed takes some practice. I suggest you get this spraying something
other than your lovingly prepared boat. Try going faster and slower until
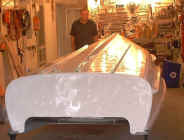
you learn what the limits are. You can see the finished port side. Notice
the good glossy finish. You must work for this on each pass. I have
included
a series of pictures that show the progression of painting the starboard
side. You can see the shine of the painted areas as I work outward from
the
keel. This should give you a good idea of how wide I have set the gun and
how much overlap I am using.
After the first pass I refilled the gun and repeated the whole process. It
is critical that you work quickly - the paint must not be allowed to dry
or
the next pass will not flow very well. Some drying will occur as the
solvent
leave the paint - If this did not happen the next pass would just run
because it would be too thick. If the paint passes the "dry"
point while you
are off re-filling the gun - stop painting! Take your lumps, pour the
paint
back in the can(s) and wait a day. You will have to let the paint dry
completely and scuff the hull before putting on any more paint.
With good primer work and care in painting it should be possible to put on
several coats and produce a high quality paint job in a single session.
The
third pass finished the job for me. You can see that the primer on the
transom is completely covered. It is wise to stop when you are done. I
know,
this sound pretty obvious, but a common beginner mistake to keep painting
because there is more paint in the can. When a pass covers all visible
feature such as the primer, stop. Continuing on dramatically increases the
odds that you will get a run.
Do yourself a huge favor and clean the gun as soon a possible after
shooting
the paint. Wet paint is much easier to clean than old dried crusty paint.
Dump the excess from the gun, wipe the inside with a stir stick wrapped in
paper towels. Put a little clean thinner in the gun and shoot some through
the gun to clean the sprayer. When you open the gun some of the paint from
the dip tube will have run back into the can. I use this to clean the
spills
of the outside of the gun. A clean paintbrush is great for sloshing the
thinner all over the gun. Dump the thinner and repeat until it comes out
clear. When you are done cleaning the gun it should not be possible to
tell
what color you were shooting! Be careful where you dump the thinner - it
will eat holes in an asphalt driveway. Paint and thinner are not
particularly good for your lawn. I suggest an old cake pan; it will
dry out
in a day or so. You can get these at thrift shops cheap and you can safely
put the dried paint in your trash when you are done.
The last picture shows the finished paint job. Compare this with the
"before" version at the top of the page.
Mark Browne
|
|
|
|
|
Aug 27, 2002
Painting the Hull- Part 1
|

|
 |
|
|
|

|
 |
|
|
|

|
|
|
|
|
|
August 27, 2002 Painting the hull - part 1
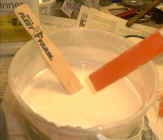
As before, I custom mixed my paint color. With Valspar marine paints I
used
2 quarts of gloss white, one quart of naptha, and about a table spoon of
Mautz orange paint. The Valspar paint is fairly thick, I like to shoot
it
with a little thinner. It does not cover as well, but it is a little
easier
to work with. The factory can't tell you to add thinner as this would
violate the EPA allowed fraction of VOCs. I mixed as much paint as I
though
I would use all at one time. In this way all the paint will match. While
I
was doing this my friend Rob blew off the boat and ran a final pass with
a
tack cloth.
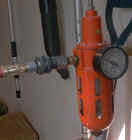
I am using an air regulator to keep the pressure into the paint
gun at 60
PSI. This is necessary, as changing air pressure will play hell with
your paint pattern. Before I put paint on the boat I shot it on an
old
trailer to adjust the feed rate and spray pattern. Its good to check
this
every time before you begin to paint. I take note of the width of the
pattern at the distance I intend to work. I will be planning the spacing
of
the passes so each just overlaps the last.
|
|
|
|
|
|
|
|
|
|
| Aug. 27, 2002
|
|

|
 |
|
|
|

|
 |
|
|
|

|
 |
|
|
|
|
August 27, 2002 - Preparing the hull for the second coat
of paint.
The first coat had a very hard shiny finish. Enamel paint undergoes some
sort of chemical change as it sets up. The solvent in wet paint can't
soften
the hardened paint to bond to it. This differs from the old lacquer
paints.
Even ten years after painting a lacquer finish, a wipe with solvent will
take it right off. You must scuff the enamel paint to add another coat,
otherwise the next layer will not stick. The micro-scratches in the
scuffed
paint give the next coat something to grab.
I have been using 180 grit. I like the 3M rubber sanding blocks for the
flat
areas between rivets. As you work you can hear the sound of the
sandpaper
change. It starts out with a harsh scratch, and changes to a muted
swoosh as
the surface become matt. For the areas where the sanding block can't
reach I
like to use the sticky backed sanding disks intended for an orbital
sander.
These disks lightly stick to your fingers and don't roll up under your
hands
as you work. In comparison to ordinary emery cloth you get a better feel
for
the texture of the paint as you work. This works particularly well as
you
scuff the fins.
After the entire hull is scuffed you should blow off the dust. This
mechanically removes the ground paint particles. The dust does make a
bit of
a mess of the shop. Still, this seem to work better than everything
else. A
vacuum cleaner seems to leave a stubborn thin film; trying to wipe the
dust
off just seems to move it around the hull. A tack cloth loads up too
quickly
to be much help.
A wipe with paper towels soaked with paint thinner (naphtha is better)
completes the prep. I had black junk and a red residue on the towels
that I
could not explain. Later I found out that my dad had been spray painting
his
battle-bot in the next bay of the garage after I went home. This had
settled
into the paint even though I could not see it with the naked eye. On
other
occasions I have gotten other residues off my paint - you can see them
in
the cloth. Wet paint is a very efficient natural sponge for
whatever is
drifting through the air. For some reason I can't fathom, stuff you
can't
see trapped in the paint *can* show up as blotches in the next coat of
paint. I feel that the solvent wash is a very important step.
The run on the transom leveled out quite nicely. I had filled in the
"pits"
left after wiping out a run in the first coat of primer. On the second
coat
of primer and first coat of paint I went a little heavy to give me
something
to sand off. It was not very even but it sanded smooth without too much
work. This may sound a little odd so let me explain. An ordinary run
makes a
very hard ridge that sticks up high above the surrounding paint. It can
be
several times the thickness of a normal paint skin. As you attempt to
sand
it off you are removing the paint on either side of the ridge at about
the
same rate as the top of the run. Long before you get rid of the run you
start to see bare metal on either side of the run. This is bad. Using a
hard
sanding block helps, but it does not completely solve this problem.
Rivet
heads make a long sanding block impossible (This is the secret to a
mirror
smooth, ripple free finish on car panels). You can wrap sandpaper around
a
small round dowel to sand the run, but I have had mixed success with
this
method. This method (wipe off the actual run and build of the area)
seemed
to work very well. In the final coat you can't see where the run was -
Yippee!
Mark Browne
|
|
|
| 8/19/02
|
|

|
 |
|
|
|
|
|

|
|
|
|

|

|
|
|
|

|

|

|
|
|
|
|
|
|
|
|
August 19, 2002
I went inside the hull and covered the various holes around the engine
control mount and transom with ez-remove tape. This is not supposed to
pull
off the new interior paint. I did not want the green primer
getting inside
to mess up my nice white interior. The only other hole to be plugged is
the
drain plug. I left the plug in place while painting the exterior. I
masked
the around the gunnels before painting. I have decided to leave the
gunnels
and coaming natural aluminum finish. These will pick up some dock rash
in
use. I think that a scratch in the paint looks worse than in bare
aluminum.
I went along the edge to be masked with 1/2" tape first. This is
fairly
flexible and easy to handle. Then I stuck newspaper to the tape with
3/4"
tape. Finally, I went around the boat on a creeper and taped all the
newspaper together. This eliminates the leakage past the paper. The only
other part that needed masking was the towing eye.
On the following morning I pushed the boat out into the sun. The shiny
clean
aluminum looked good. I was tempted to grab a buffing wheel and bring it
to
a high shine right then and there. I got over it. I shot the
etching
primer. As with the inside paint, I followed the instructions as to
mixing,
filtering and time. Two coatings of zinc chromate and a coat of custom
mixed
off-white paint.
Overall this coat turned out OK, but there were enough defects that a
second
coat was needed. Rats. As I was trying to get the first coat of primer
around the drain hole I got a nasty build up (run) on the transom.
Normally
I would expect to sand this down. I tried an experiment this time. I
wiped
the run off as soon as I spotted it. This was the first coat and I
expected
to cover it with the second. I was curious whether this would be less
work
to sand later. I will let you know how this turns out.
One of my first jobs was in a truck garage. I did lots of sanding work
and a
little masking, but other folk did the actual painting. Like almost
anything, it seems a lot easier when you are watching someone who knows
what
they are doing. One of the other things I miss most is the spray booth.
A
good booth controls the dust and bugs, provides good lighting, and
whisks
away the fumes. I am getting tired of bug hits on my wet paint.
Note the photo of where I have been working. My dad told me not to
bother
with putting down paper where I am spraying - the over-spray does not
bother
him. You might feel different about your driveway. I don't think it is a
good idea to spray inside a small garage. The over-spray will end up
coating
EVERYTHING.
Mark Browne
|
|
|
|
|
|
|
|
|
|
8/18/02
|
|
|

|
 |

|
|
|
|
|

|
 |

|
|
|
|
|

|
|
|
|
|
|
|
|
|
|
|
|
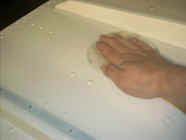
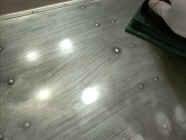
August 18, 2002
The hull has been striped for a long time. There was a slight coating of
oxide forming on the aluminum. This prevents the paint from getting the
best
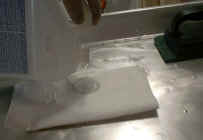
grip. I have developed a good stripping method. I put a folded paper
towel
on the hull. I soak it with paint thinner. I swish this around to wet
the
hull. I use the scotch -brite pads to move the towels. Some of the
thinner
goes into the pad and it seems to work a lot better this way. The
thinner
acts as lubricant for the pads and suspends the particles as they are
stripped off.
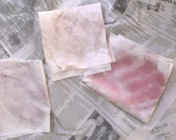
As I rub it in the thinner becomes dark with oxide particles. Finally, I
reused the folded towel to pick up the used thinner and oxide. You can
see
the amount of junk I have pulled off the hull in the used towels. A side
effect of this method - the surface picks up a fine matte finish. You
can
compare a photo of the transom as stripped to the same area after
scrubbing.
I don't think it matters at all to the paint, but it does look nice.
Mark Browne
|
|
|
|
|
| 7/22/02
|
|
|
|
|
|
|

|
 |

|
|
|
|
|

|
 |

|
|
|
|
|

|
 |

|
|
|
|
|

|
|
|
star ferry- Hong
Kong
|
|
|
|
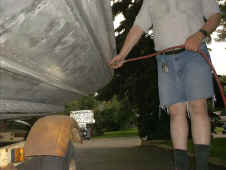
July 22, 2002
I just came back from another trip to the Orient. I had a chance to ride
on
the famous star ferry in Hong Kong. I have a high resolution version of
this
photo if you would like a nice wallpaper for your very own. E-mail me
with
your requests.
I am trying to wrap up the prep work before painting the outside of the
hull. The last 45 years have battered the seal material between the main
skins - Some ragged bits of a rubbery material are sticking out here and
there. Mostly this is a place for ice to build up and split the hull
when it
freezes. I have dribbled in polyurethane from the inside for water-tight
seal. Now I need to close up the gap from the outside.
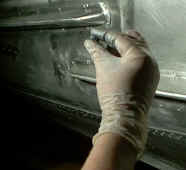
I wire brushed the outside to strip out the dead rubber and dirt.
This was
followed with a blast of compressed air. In some spots big clouds of
dirt
and dust spurted out the seam.
I have selected a log of epoxy as the filler material. You can get this
stuff in the adhesives section of most well stocked hardware store.
Automotive supply shops sell this as "Gas tank sealer". I have
been using
this for years and have had very good luck with it. It will seal with
gas
running out of a tank. It has stays on for years without leaking. I
think
that every metal boat owner should keep a package of this stuff in the
tool
kit. It just might get you home after hitting a submerged log. Oh, and a
pair of rubber gloves. This stuff sticks to everything, and it takes
forever
to wear off your hands if it touches your skin.
This epoxy come with different curing times. I picked 10 minutes on a
whim.
With many epoxies longer curing time gets you a stronger glue. I suspect
that two hour cure might have been a better choice. One four inch log
did my
entire hull.
My application method was fairly straight-forward.
I sliced off about as much as I could use in a few minutes. (about 3/16
inch) You mix this stuff by kneading it between your fingers. When it is
a
uniform metal color it is ready to apply. I stuck on little globs spaced
about every 1.5 inches. I had to experiment to get optimum spacing.
I
forced the material into the seam with a plastic putty knife. I scraped
up
the excess and moved on down the seam. Just about the time I was running
out
of material I would reach the next glob.
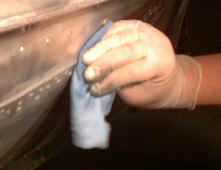
I finished with one last pass to compress the epoxy and drive it as deep
into the seam as possible. This leave a fairly smooth seam. I wiped
(rolled
up) the excess with a damp paper towel.
To complete the job I ran a razor blade down the seam to get a clean
edge
and remove any excess sticking to the hull outside the seam. in a few
cases
I had to do a little more cleanup with the dampened cloth.
It took the better part of two evening to get the seam I was looking
for.
Mark Browne
|
|
|
|
|
|
|
July 22, 2002
|
|
|
|
|
|
|

|
 |

|
|
|
|

|
 |

|
|
|
|

|
 |

|
|
|
|

|
 |

|
|
|
|

|
 |
|
|
|
|
|
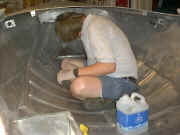
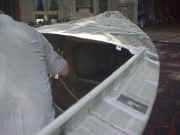
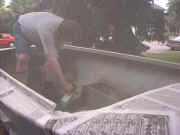
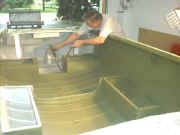
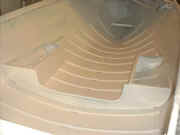
July 22, 2002 - Painting, inside the hull.
After my friend Rob helped me patch the leaky rivets and seams; it is
time
to do some painting!
This burns up a full day for the primers and first coat. Add a day for
each
additional coat. With the Valspar paints system you start with a vinyl
etchant mixed with reducer (wait one to six hours) , two coats of zinc
chromate thinned with marine solvent (wait 3 hours after each coat), and
two
or more coats of paint thinned with paint thinner (wait 24 hours each
for a
full cure).
I started with a wipe of every inch with paint thinner. Every finger
print
has to go. This was followed with a wipe down with acetone. I blew out
the
paper towel fragments, then vacuumed the remains. As I was working I
used a
magnet to pick up stray wires from the wire wheels. These are too heavy
for
the vacuumed cleaner to deal with. After several hours everything looked
pretty good.
My Dad helped me mask and paint the boat.
My plan is to do the interior, then the hull, and the deck last. We
masked
over the splash rails, bow and stern. I left the base of the splash
rails
exposed.
Then we pushed the boat outside. The vinyl etchant uses a very hot
solvent.
I don't want to spray this stuff inside without weapons grade
ventilation. I
started spraying inside, shooting the bow, stern and seat boxes. Correct
gear is a mask and rags tied over the shoes. Run a good hand cream into
all
exposed skin. One of the pictures shows the fumes trapped inside the
hull.
All the mask does is stop the particles. The solvents go right through
the
mask. I got one breath of this stuff and it made me queasy for
over an
hour. I held my breath while I ducked under the bow to shoot it. I had
to
stand from time to time a get a breath of fresh air. If I have to do
this
again I will position a window fan to ventilate the interior of the
hull. We
tried this later with the paint and it worked very well. When the tricky
details were done I got outside and finished standing next to the boat.
The
etchant is almost translucent, it is very hard to tell if you have put
enough on.
I learned that I should have wiped the inside with a tack cloth; I ended
up
with some smut under the primer. I was heart broken with how much dust
was
stuck in the primer after the care I took in cleaning. My dad turned me
on
to tack cloths - they cost about sixty five cents and one will remove
most
of the dust and hair from a 16 foot hull. After the first coat I buzzed
over
to my nearest fleet farm and bought a batch.
After a delay (more than one hour but not more than six!) we repeated
the
process with zinc chromate. After this has set up for three hours you
need
to wipe the primer with tack cloth. This will pick up any tiny blobs of
semi-dried primer that fall and sticks to the surface. You must do
this
between the coats of primer as the blobs expose the raw hull when you
pull
them off. This will insure that the second coat fills in these holes.
After
the wipe we shot the second coat of primer.
We moved the boat inside to avoid dust and bugs. After three more hours
I
wiped the hull again. Be very careful with the primer; It protects the
aluminum and gives the paint a good grip but it is very soft and easy to
scrape.
We mixed a little bit of the accent color into the white paint. This
breaks
the harsh white; in my case this gives me a peachy colored paint. We put
the
paint on inside the garage. We applied the paint in the same order as
the
primer - bow, seat boxes, stern, gunnels, sides and floor.
As I write this the paint is drying for a full day. Then I will sand out
a
nasty run (doh!), tack cloth the dust and shoot a second coat. If you
look
close you can see that the first coat is a little thin in a few spots.
The
second coat should produce a good solid cover.
Mark Browne
|
|
|
|
|
|
|
|
|
|
|
|
|
|
|
|
|
|
July 13, 2002
|
Recent updates are listed first |
|
|
|
|
|

|
 |

|
|
|
|

|
 |

|
|
|
|

|
 |

|
|
|
|
|
July 13, 2002
After competing the metal work I turned to the task of painting the
hull. As
I have worked on the boat I have been noticing traces of corrosion here
and
there. My original plan was to scuff the remains of the interior paint
and
cover it with a new coat. The wisps of corrosion caused me to re-think
this
plan. If I paint over existing pockets of corrosion it will just bubble
up
through the new paint in nothing flat. I elected to remove all traces of
the
existing paint. I agonized whether I could use chemical strippers. My
biggest concern was whether it would attach the caulking in the riveted
seams. In the end I decided to chance it. The deciding factor is that it
would allow me to inspect the surface and see how it had held up for the
last 45 years of use.
For most of the stripping I used Bix Tough Job. A good fan and rubber
gloves
are must-have items with this stuff. You paint this foul smelling stuff
on
and wait about 15 minutes. The timing is critical. Too soon and it
really
does not do much of anything. If you wait too long it "dries
up" and does
not seem to work as well. Thicker coats are better as they have a longer
working time. If everything is as it should be, the paint wrinkles up
and
you can slide it off with a plastic scraper. It seems that the optimal
batch
is about 3 square feet at a time. There is a thin coat of chemical slime
after you scrape the paint off. You can wash it off with water but this
is
hard to do with the boat in the garage. You end up with a pool of nasty
water in the bottom of the hull. When most of the paint was
removed I was
left with a few trouble spots that needed additional attention. I tried
a
citrus stripper to finish up to job. I planned to work under the bow and
stern. I hoped the fumes would be a little more pleasant than the Bix
stuff.
They were. Don't let the "all natural" wording on the label
fool you. You
REALLY don't want this stuff on your hands. The citrus stripper
dissolves
the paint quickly. It also did the same to my rubber gloves. I was
rubbing
this stuff in with scotch-bright pads. Some of the stripper would come
through the pad and soak the gloves. A pair of nitrile rubber gloves
lasts
about 3 minutes with direct contact. The stripper takes the oil out of
your
hands where it leaks through the gloves. I ended up with nasty
dish-pan
hands out of the whole affair. Of the plus side, the hull is pleasantly
paint free and the garage smells like oranges!
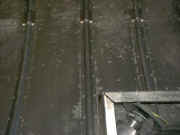
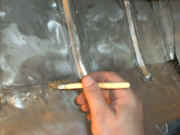
The next two pictures show the extent of the corrosion. It seems to
spread
from the ribs. I have another shot of the transom showing the heavy
crust of
corrosion that had formed under the transom wood. Even with periodic
repainting, this rot will be what eventually kills the boat. At some
point
the hull will rupture along a hidden pocket of corrosion under a rib. I
don't think there is much you can do about it. You *could* pull up the
ribs
and clean up the mess. I advise against it. Even with careful work you
do a
little damage every time you drill out a rivet. If you pulled up all the
ribs I suspect you would end up doing more harm that good. The best you
can
do is to wash the boat out with clean water after use and keep it dry
otherwise.
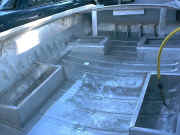
Several days later the inside of the hull was shiny metal everywhere.
All
visible traces of corrosion are gone. Most if the work was with a wire
cup
brush in an angle grinder. Where possible I used an orbital sander with
80
grit paper. It does a very good job of removing the paint and corrosion,
but
the rivet tails rips this stuff up pretty fast. At 20 cents a disk this
adds
up quickly. I finished up the last hard to get areas with a 4 inch wire
wheel on a drill.
It all looked good (see photos) but I was concerned about traces of
stripper
trapped under the ribs. I decided to fill the hull with water. I have
washed
it several times to remove the stripper, but a through soak seemed lake
a
good idea. The other reason was to check for leaks. You can't fill the
hull
to the top, it would be much too heavy for the trailer. Four to six
inches
is enough to cover the seams other rivet works. I actually filled the
hull
twice, once to check the aft part of the hull, and one to check the bow.
I
adjusted the angle of the boat to cause the water to pool where I wanted
it.
I found six leaky rivets; all were new replacements. The worst leaker
was
clearly over driven. The others actually looked pretty good. I suspect
that
the rivet holes were damaged while drilling out the old ones - it is
very
hard not do make the hole a little egg shaped. I will replace the bad
rivets
in the next few days. All will be installed with a dip in RTV sealer.
I noticed that a few spots in the main seams were weeping. This is more
of a
problem. I blew these seams out with compressed air. Then I propped the
boat
so that the seam were on the bottom. I dripped in some oil based
polyurethane using a paint brush. After all seams are treated this way I
plan to wire brush the outside of the seams and fill them. My plan is to
use
the type of epoxy that comes in a log. You slice off a chunk and knead
it to
activate the hardener. Then I will force the stuff into the seam with a
blade. I have sealed gas tanks on cars with this stuff and had it lasted
for
years. It should work fairly well in this application.
This project is more work than I expected. I started this in May, now
the
summer is half over. I had hoped to watch fourth of July fireworks from
my
boat. Now I will be happy if I get it in the water before the snow
flies.
Mark Browne
|
|
|
|
|
|
|
|
|
|
|
|
|
| June 23, 2002
|
|
|
 |
 |

|
|
|
|
|
 |
|
|
|
|
|
|
|
|
|
|
|
|
June 23, 2002
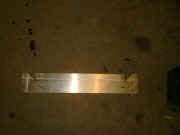
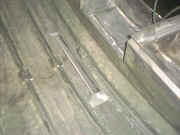
I was not happy with the rear seat modification done by a prior owner. I
elected to leave the change, but I added a doubler and rolled edge to
the
existing rib. This was formed from a leftover scrap from the seat
fabrication. This part restores a significant portion of the original
strength. The photos show the details of fabrication and installation.
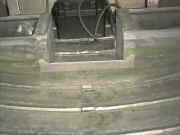
Crestliner had covered the drainage holes with the forward sheet of the
rear
bench seat. You may wish to inspect your boat and see if you have the
same
problem. I opened these holes with a power rasp. The boat should drain a
little quicker now!
Mark Browne
|


